Invitations
As opposed to the normal B2C paradigm of self sign-up, invitations allow you to bring an outside user into your B2C tenant. The user is sent an invitation by email with a sign up link and you have a customisable B2C experience that you can run them through.
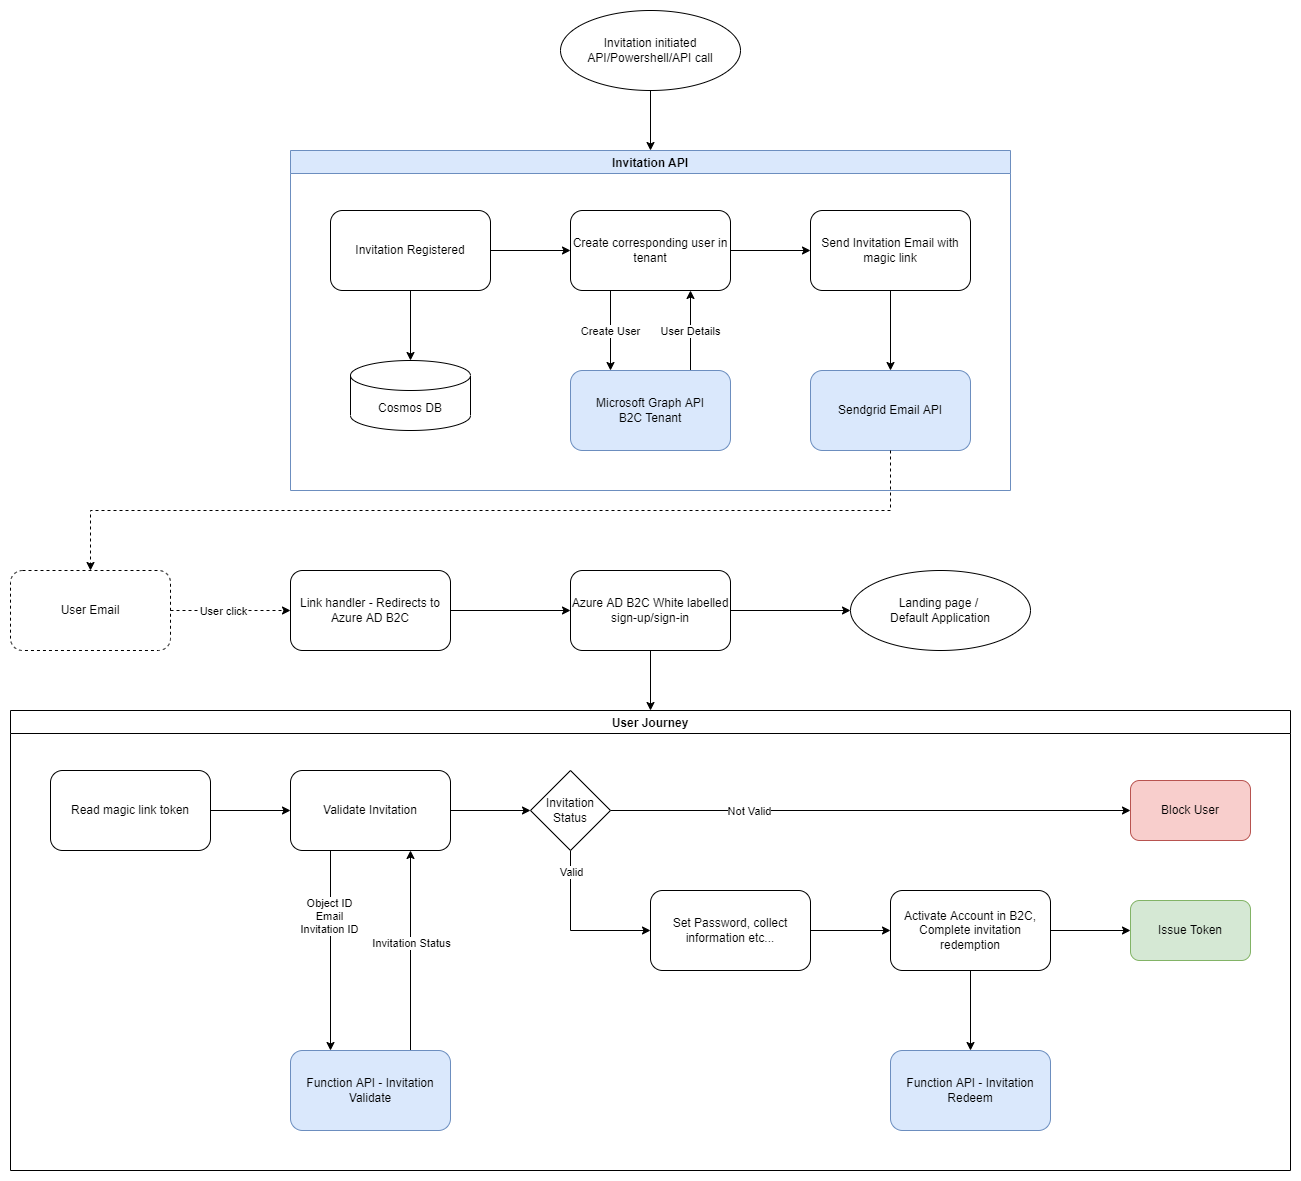
The following diagram illustrates the invitation process
Creating and sending invitations require that your management app has a private key certificate. This means you'll need an App Service Plan Tier that supports it. (B1 Tier and above)
Create a certificate
We will be using a self signed certificate to secure invitation emails by generating tokens that can be read by B2C. To generate this certificate, use the following script in a pwershell terminal with admin privileges.
$cert = New-SelfSignedCertificate -Type Custom -KeySpec Signature -Subject "CN=rampart.whoiam.ai" -KeyExportPolicy Exportable -HashAlgorithm sha256 -KeyLength 2048 -KeyUsageProperty Sign -NotAfter (Get-Date).AddMonths(24)
$CertPassword = ConvertTo-SecureString -String 'yourrandompassword' -Force -AsPlainText
# Replace this password with your own. You will need this later to install this certificate in B2C and the app service
$thumbprint = $cert.thumbprint
Export-PfxCertificate -Cert "cert:\LocalMachine\My\$thumbprint" -FilePath C:\RAMPARTCert.pfx -Password $CertPassword
You will find this certificate in your C:/ drive root.
Add to App Service
To add this certificate to your app service, the process is the same as uploading a regular TLS/SSL certificate. Follow this process to upload a certificate. No bindings are necessary.
Add an App Registration
A security requirement of Azure Active Directory is that all the possible redirect urls for an application you run a policy against must be registered in the app registration. So you would need to register an application for invitation handling and specify your landing page as a Redirect URI.